

Selenium Grid is a powerful tool that allows you to distribute your Selenium tests across multiple machines, browsers, and operating systems, enabling parallel test execution and significantly reducing the testing time. It forms the backbone of any scalable and efficient test automation infrastructure. In this blog, we'll walk you through the step-by-step process of setting up and configuring Selenium Grid to supercharge your test automation efforts.
Prerequisites
Before diving into the configuration process, make sure you have the following components ready:
Java Development Kit (JDK) installed on your machine.
Selenium Server (also known as the Selenium Standalone Server) downloaded and available for use.
Desired browsers and their respective WebDriver executables installed.
Basic understanding of the command-line interface (CLI) to execute commands.
Step 1: Download Selenium Server
The first step is to download the Selenium Server (selenium-server-standalone.jar) from the official Selenium website. Ensure you have the latest version compatible with your test framework and requirements.
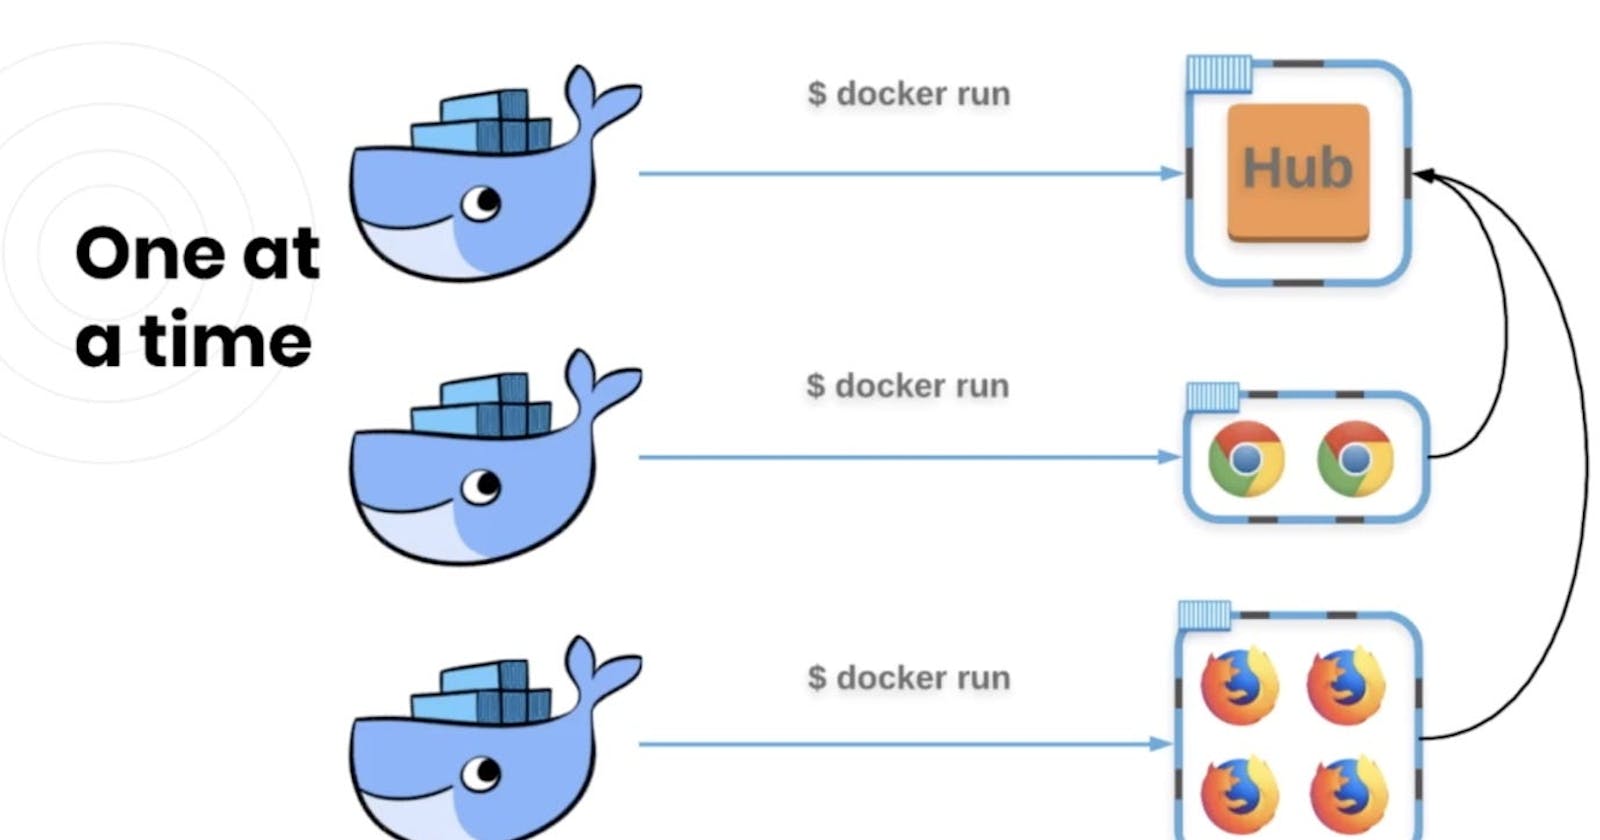
Step 2: Set Up Hub and Nodes
Selenium Grid operates using a hub-node architecture. The hub acts as a central point where you register your tests, and nodes are remote machines running browsers where the tests are executed. You can have multiple nodes connected to a single hub, enabling parallel test execution.
- Start the Hub: Open your terminal or command prompt and navigate to the directory where you placed the
selenium-server-standalone.jar. Use the following command to start the hub:
bashCopy codejava -jar selenium-server-standalone.jar -role hub
- Register Nodes: To add nodes to the hub, you need to start Selenium Server on each machine you want to use as a node. Replace
<HUB_IP>with the IP address of the machine where the hub is running.
bashCopy codejava -Dwebdriver.chrome.driver=/path/to/chromedriver -jar selenium-server-standalone.jar -role node -hub http://<HUB_IP>:4444/grid/register
Make sure to specify the correct path to the WebDriver executable for each browser (e.g., Chrome, Firefox, etc.) you want to use in your tests.
Step 3: Configuration through JSON
You can simplify the process of registering nodes by using a JSON configuration file. Create a JSON file (e.g., nodeConfig.json) with the following content:
jsonCopy code{
  "capabilities": [
    {
      "browserName": "chrome",
      "maxInstances": 5
    },
    {
      "browserName": "firefox",
      "maxInstances": 5
    }
  ],
  "hub": "http://<HUB_IP>:4444/grid/register",
  "maxSession": 10,
  "register": true,
  "registerCycle": 5000,
  "timeout": 30000
}
Then, use the following command to register nodes:
bashCopy codejava -Dwebdriver.chrome.driver=/path/to/chromedriver -Dwebdriver.gecko.driver=/path/to/geckodriver -jar selenium-server-standalone.jar -role node -nodeConfig nodeConfig.json
Step 4: Verify Grid Configuration
Once you have set up the hub and nodes, navigate to http://<HUB_IP>:4444/grid/console using your preferred web browser. The Selenium Grid console will display the registered nodes and their capabilities. You should see the browsers and the maximum instances you specified in the configuration.
Conclusion
Configuring Selenium Grid allows you to harness the true potential of distributed test execution, enabling faster feedback loops and efficient utilization of resources. By following the steps outlined in this guide, you can set up your own Selenium Grid and take your test automation to the next level.
Remember to keep your WebDriver executables up to date, regularly maintain your test scripts, and continuously monitor and optimize the test execution to ensure a smooth and seamless testing experience. Happy testing!